Woodcraft Article Ideas: Crafted by Larissa Huff
Below you'll find a few of the projects I have made over the past couple of years. Let me know if I can send along any more photos or useful information about any of them!
Scout Chairs:
These slatted deck/yard/camping/beach/park chairs are ideal for any use. Although the idea for this chair has existed in many forms for many years, we have worked hard to perfect the design as well as the jigs and processes to craft our iteration. The backs and seats are separate pieces that nest together into a compact, storage-ready unit that can be toted around by the curved handle cut into the top slat. These guys can be made one or two at a time with some fancier hardware and a fun-shaped handle slat at the top, or they can be made in mass runs. With Jeff’s guidance and push, I was left largely in charge of the runs of sets of 24 of these we have made at the shop. The project requires a huge amount of template and jig making- jigs for cutting the legs using the router table, jigs for assembling each back and seat piece, and jigs for slat placement and attachment, lots of jigs! You can check out the page we have for these on the studio site: http://www.lohrwoodworkingstudio.com/scout-chairs


Free Form Routing:
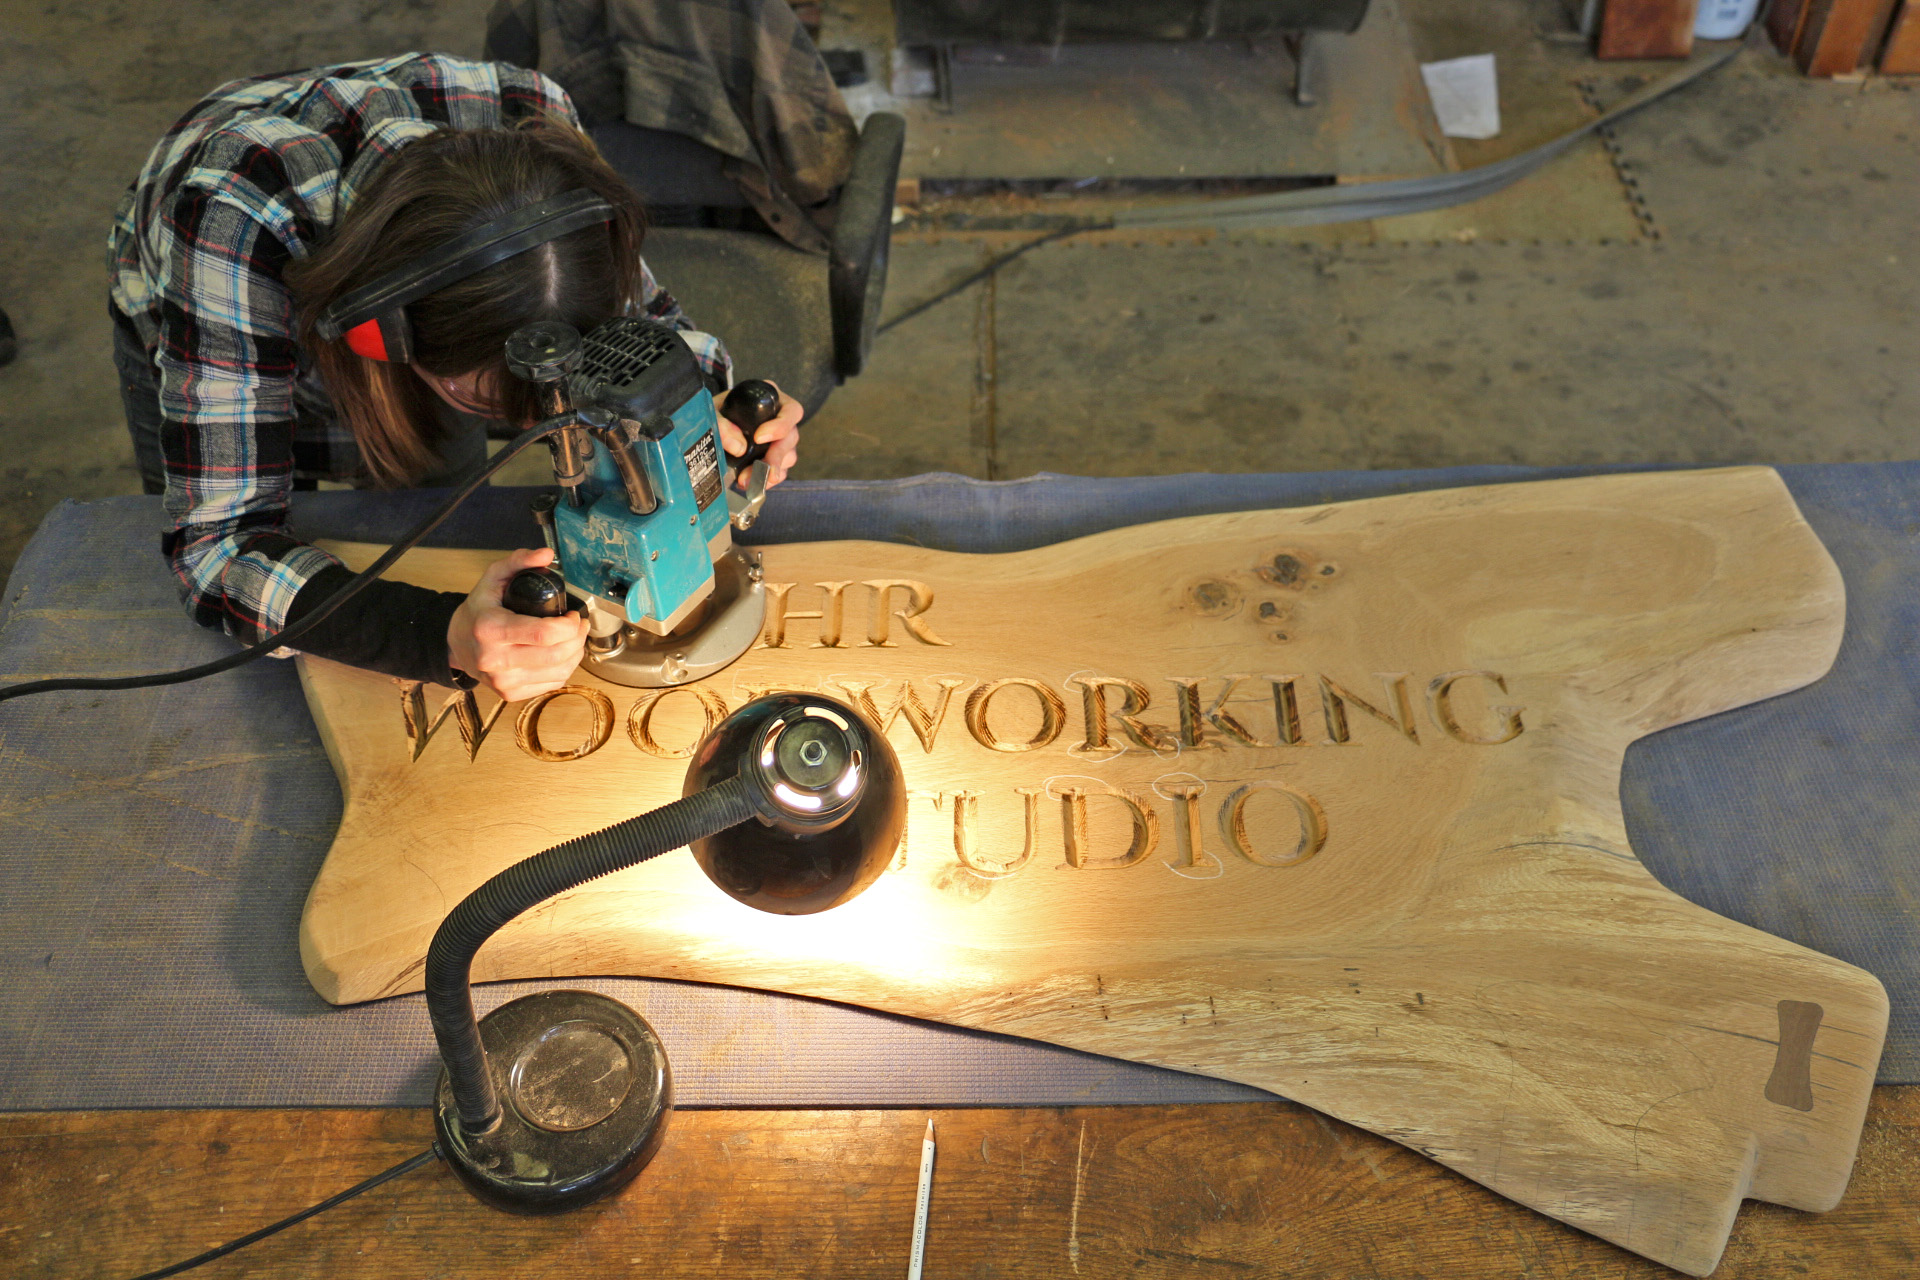
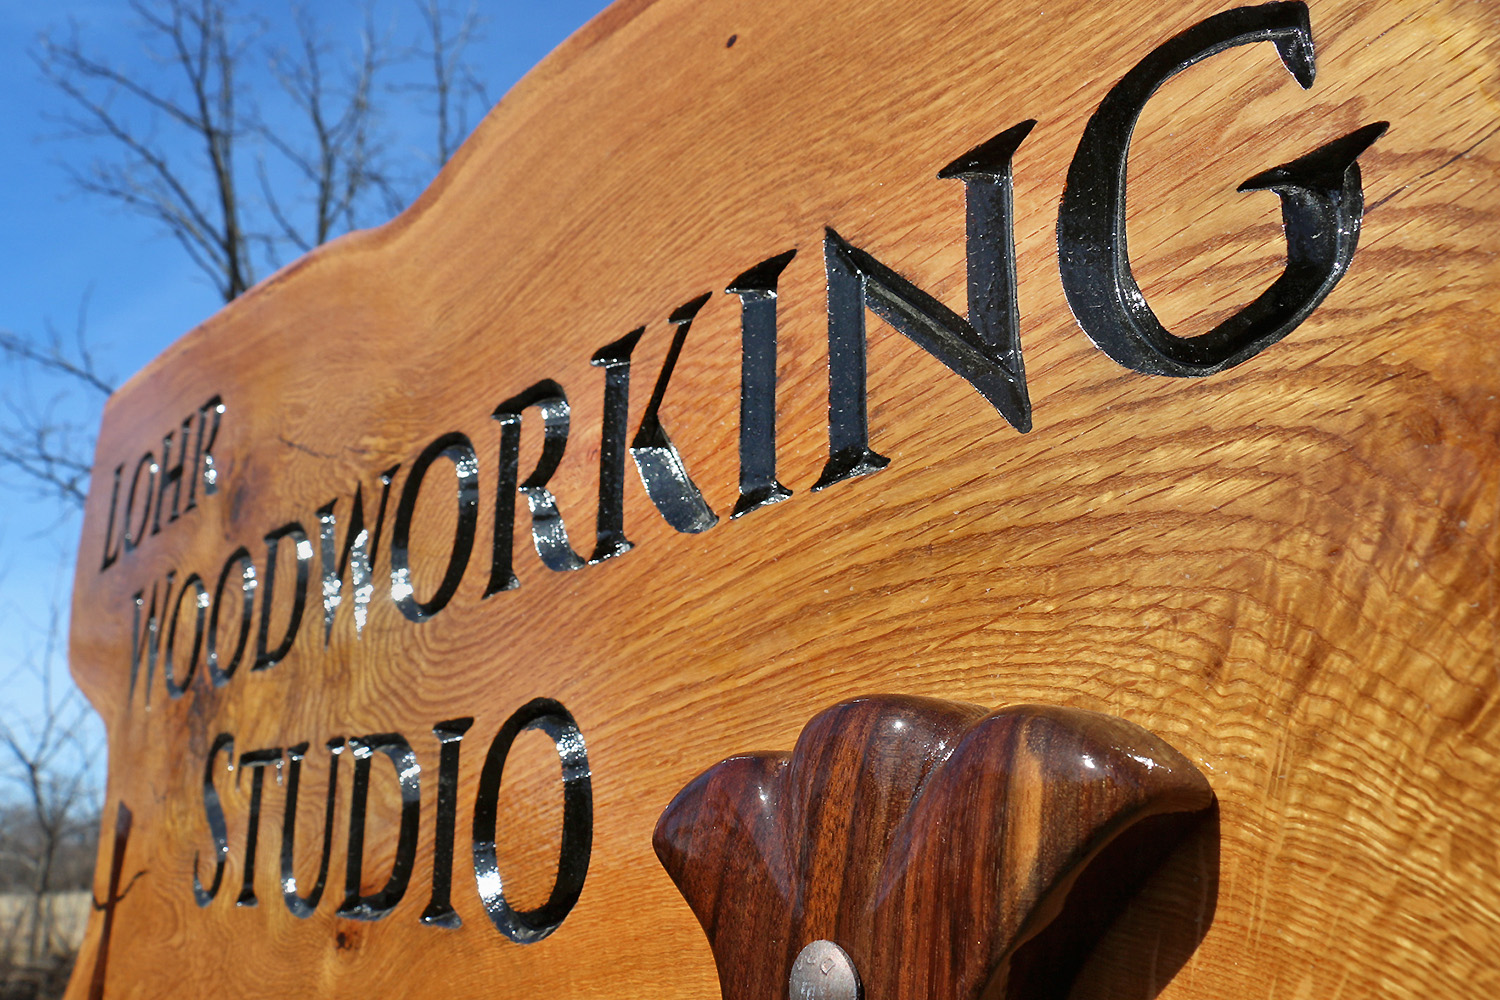
I do a lot of router work free hand. Whenever I describe this to our students, they seem to freak out, thinking that the router will jump all over the place. I've found that simply taking a deep breath, using lots of light, and marking clear layout lines, it's not so crazy to rout things freehand. I use this technique the most in making signs for the shop and clients but, I also use it regularly in the bone inlay you see in much of our furniture to repair natural splits and checks.
You don't need a clunky sign making jig to make really unique signs. I project the text onto the material, then carefully trace it out in pencil. Using a v-groove bit, I follow the lines to cut out the text while paying careful attention to using the necessary plunge depths. There are a lot of creative things you can do with different line weights and finishing to make these signs really pop. I could even do a Woodcraft Magazine sign!
The bone inlays are done using the same technique, though it's far more critical you don't overstep your marks here. Because each bone has a unique shape, for a flawless fit, I trace around the bone with a knife, then rout to the knife line. Because the wood fibers are severed, it's easily apparent when you've hit your mark. I've used the same process to do things like inlay a fish-shaped maple piece into a cherry fillet board for a fisherman. Careful knife layout and great lighting are essential to executing this well.


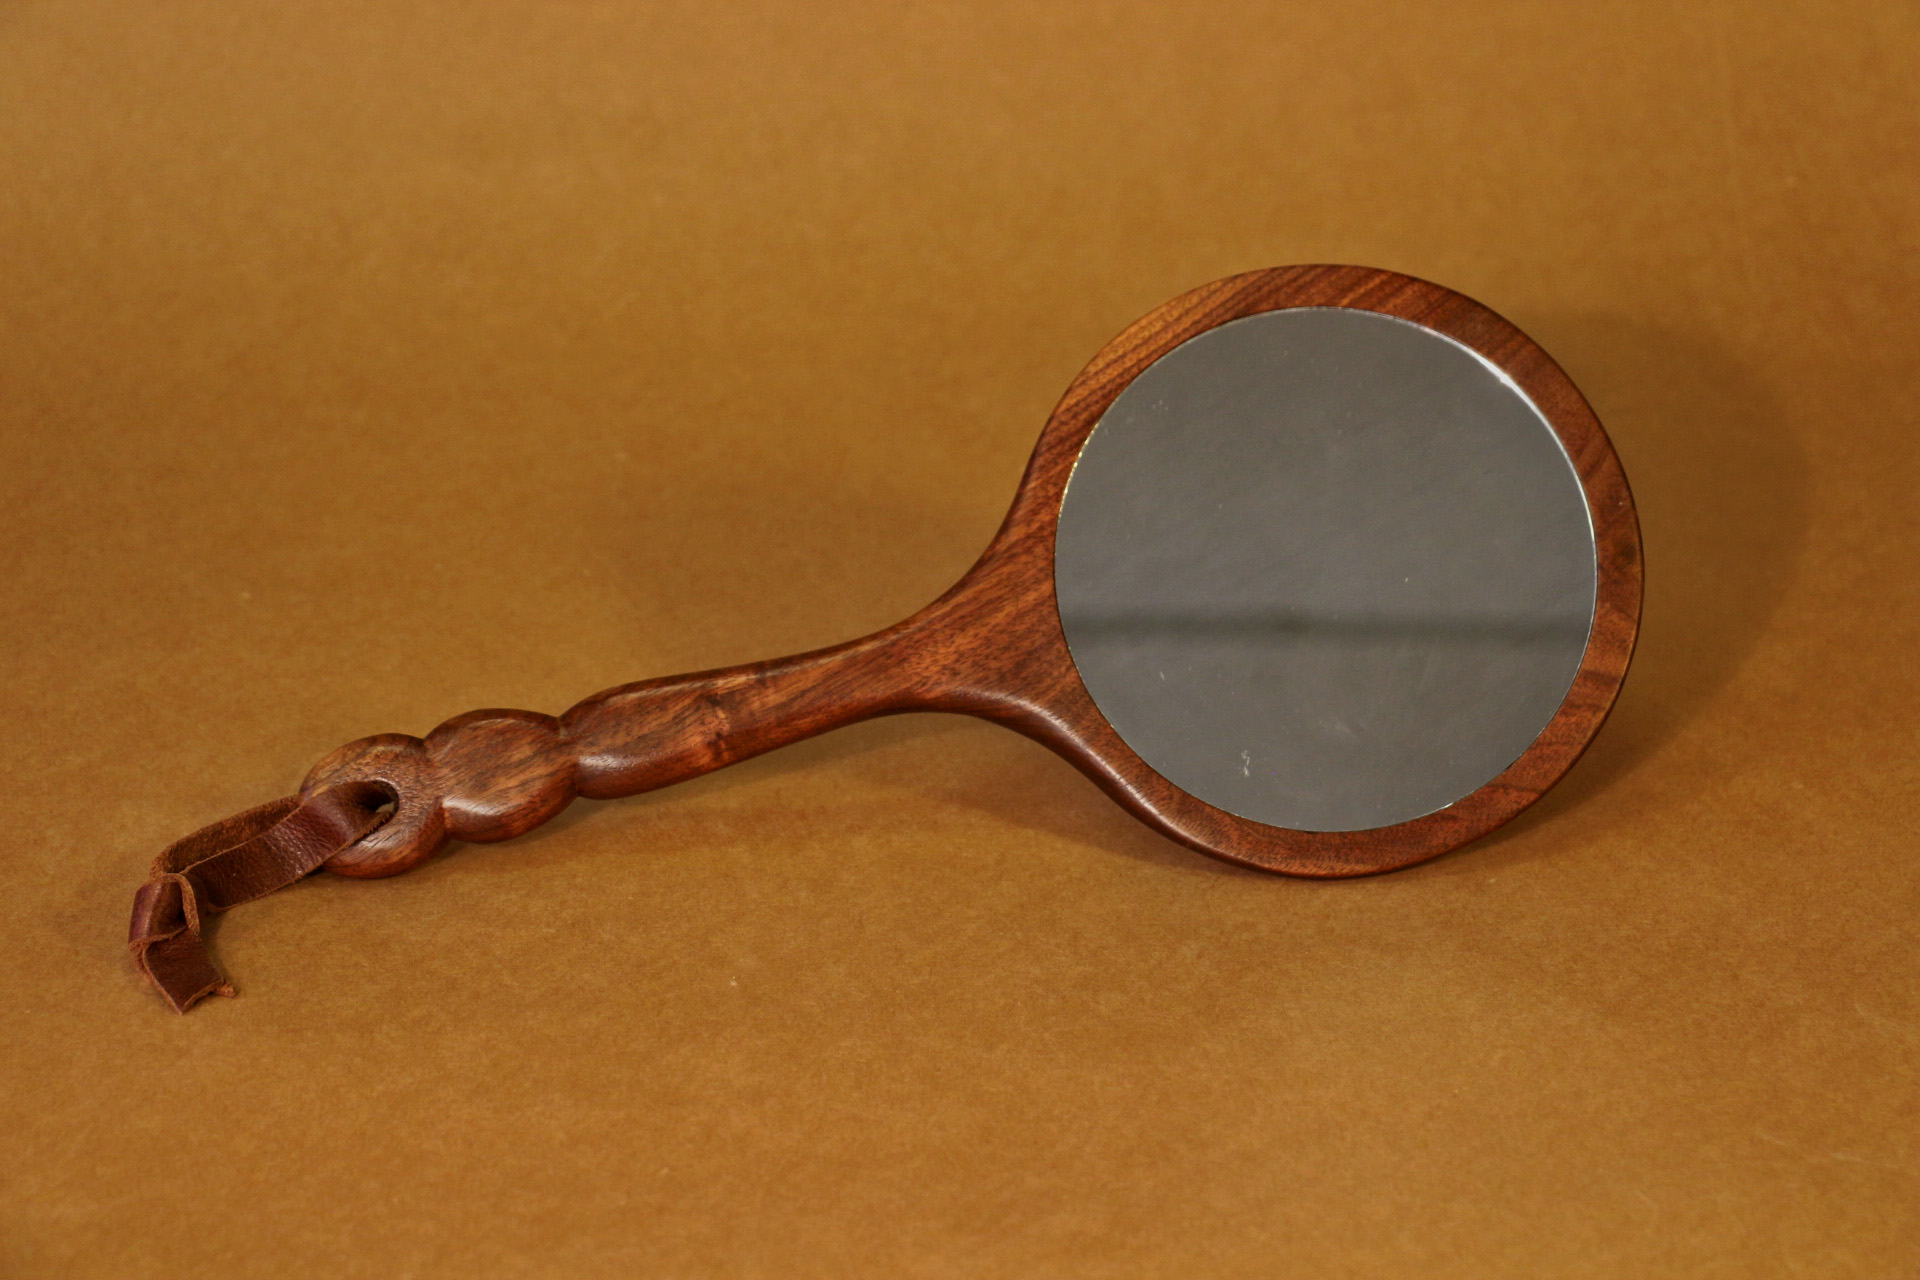
Hand Mirrors:
Hand mirrors were some of the first projects I ever made as an apprentice and I just fell in love with how much space they allow for fun design, patterns, and shaping. Over the years, I have made some from patterned glue-ups, some with curvy, twisted handles, and some even incorporated brass rivets- below are just a couple of the ones I have left at the shop yet to be sold. The project requires some carefully-shaped router template making to cut perfectly sized holes to house the mirror. As I mentioned, it requires some creativity as there is the need for interesting layout/designing. I use the band saw and sanding drum to get the rough shape and then lots of hand tools to do the detailed the shaping (usually a spoke shave, a hand plane, and/or some files). If this project is chosen I can make one that focuses on one or two specific skills, so it may include an more complex pattern glue up, some intricate handle shaping, incorporate rivets, and/or be made from a piece of wood with a split or check that requires a decorative dovetail butterfly/bone inlay in the back.


Clocks:
Something fun and interesting to do with basic plugs! I like to use live edge pieces of figured wood for these because it contrasts nicely with the hard, crisp edges of the round plugs. This project requires some jig-making for the drill press, careful layout for the clock face, and router template design to cut a space to house the clock movement. The hour placement for these is really crucial to ensure the clock is always showing the correct time, so the layout and drill press jig are essential to making sure the spacing and radius of the hour markers are consistent. I am also currently working on making some new clocks with concentric circle plugs marking the hours as well as one with crafted wooden hands that adds another element of complexity having to perfectly balance the weight of the hand ends from the center of the clock.


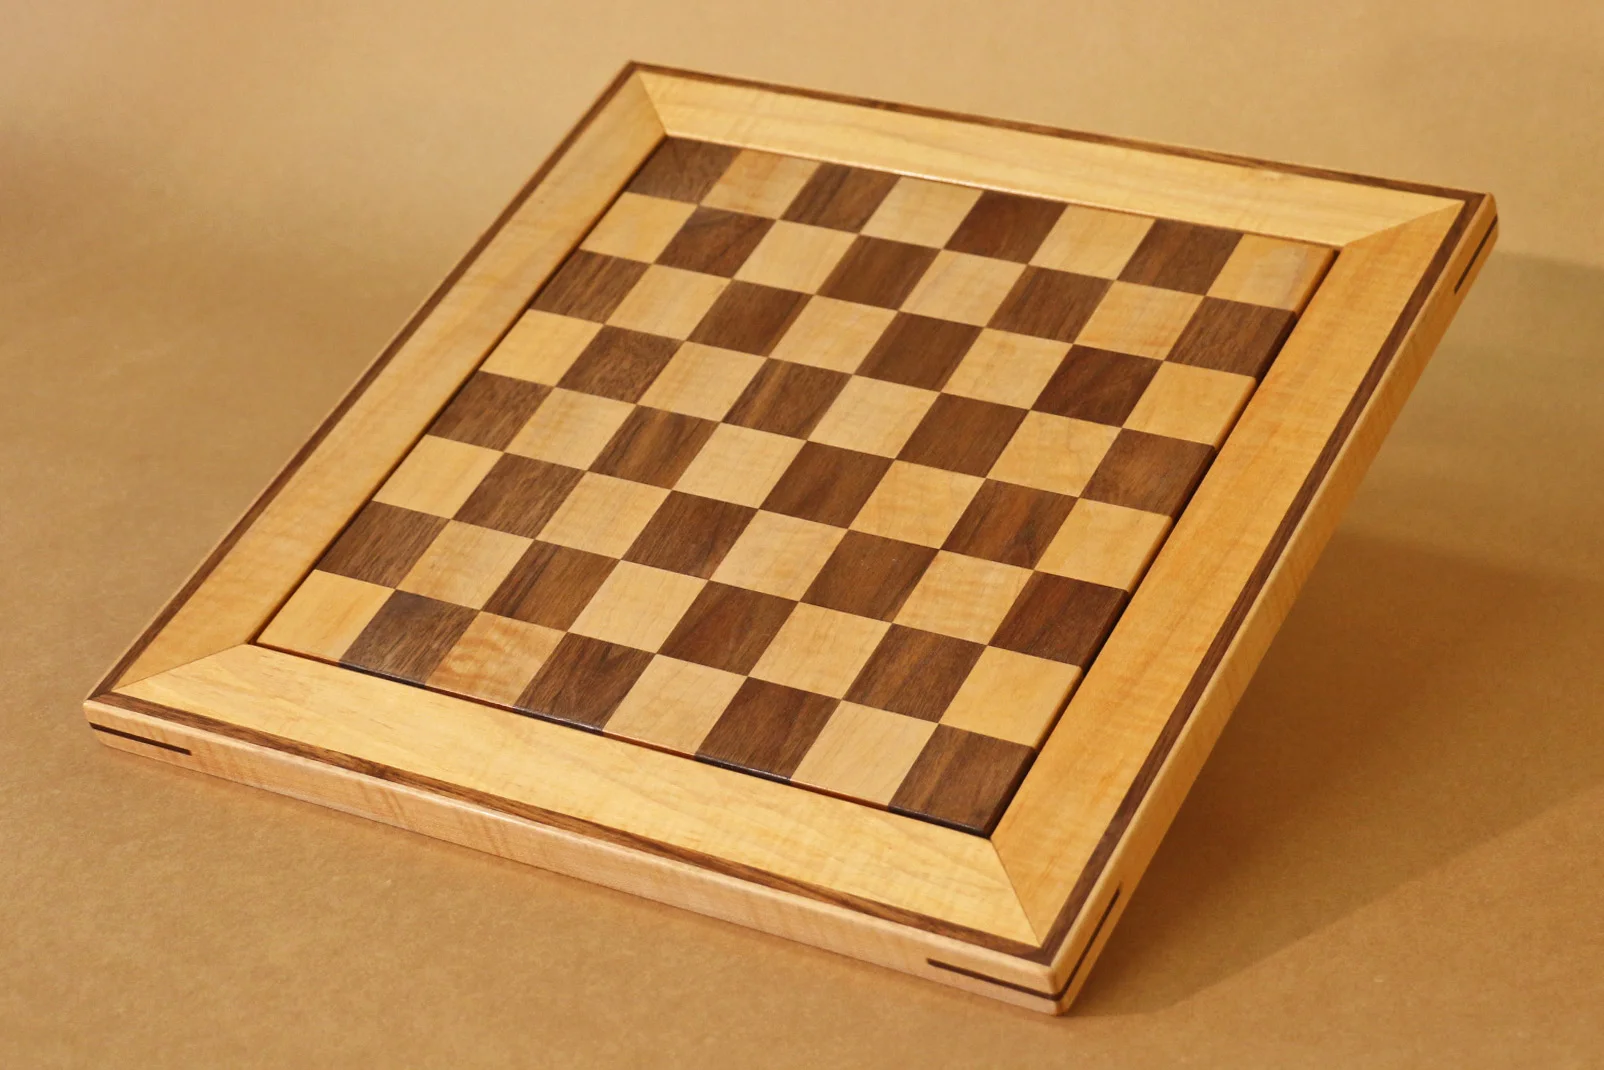
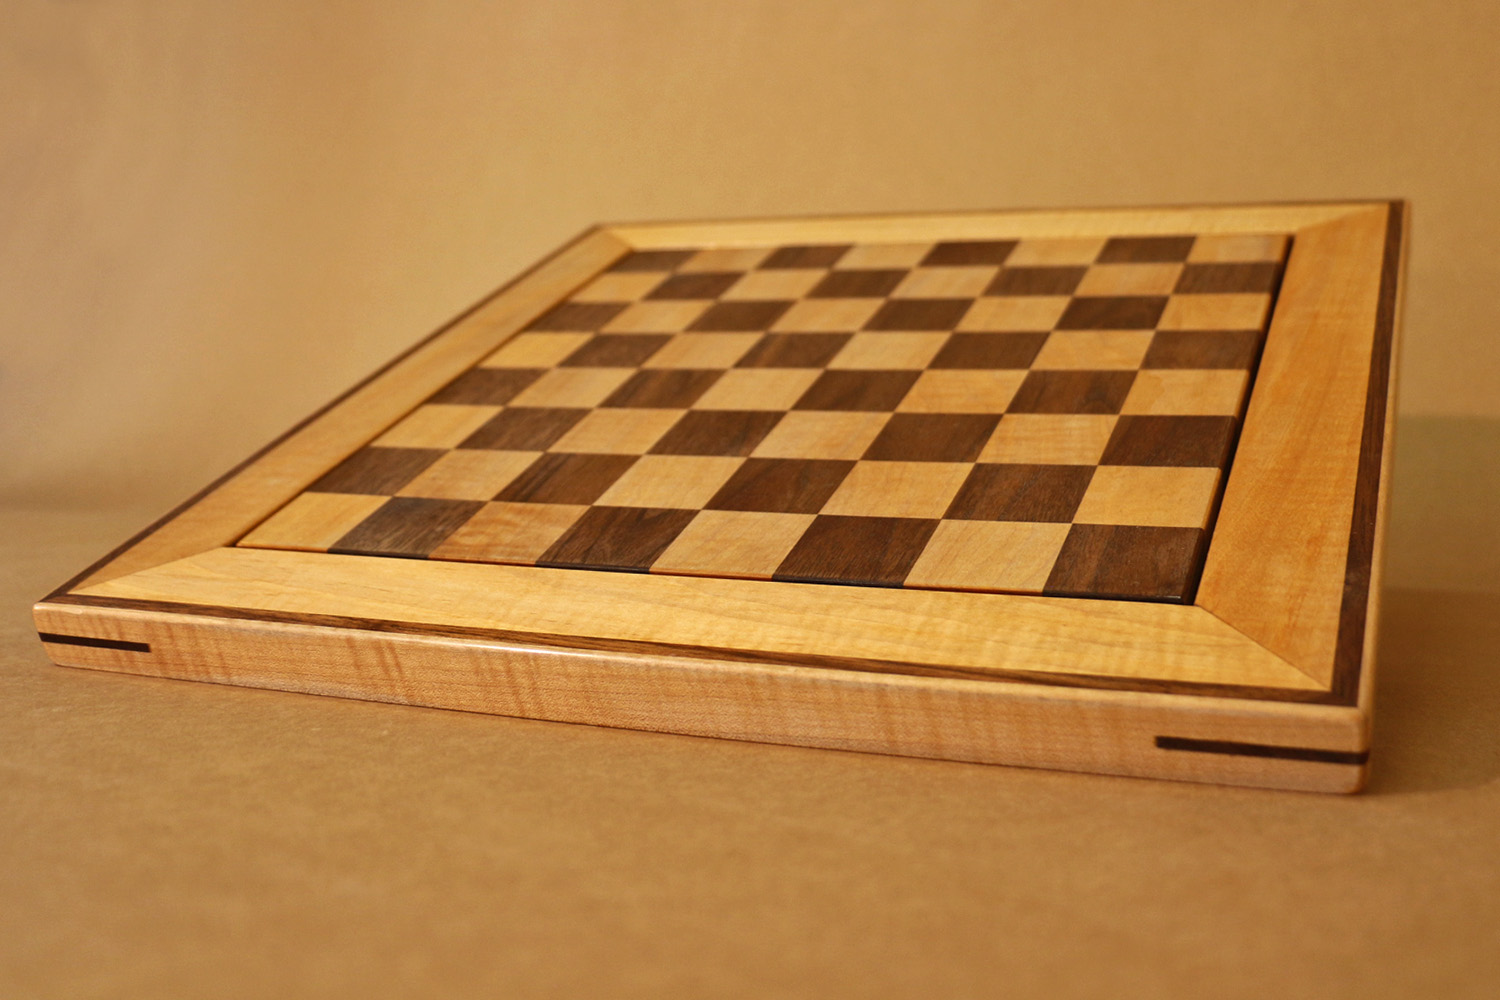
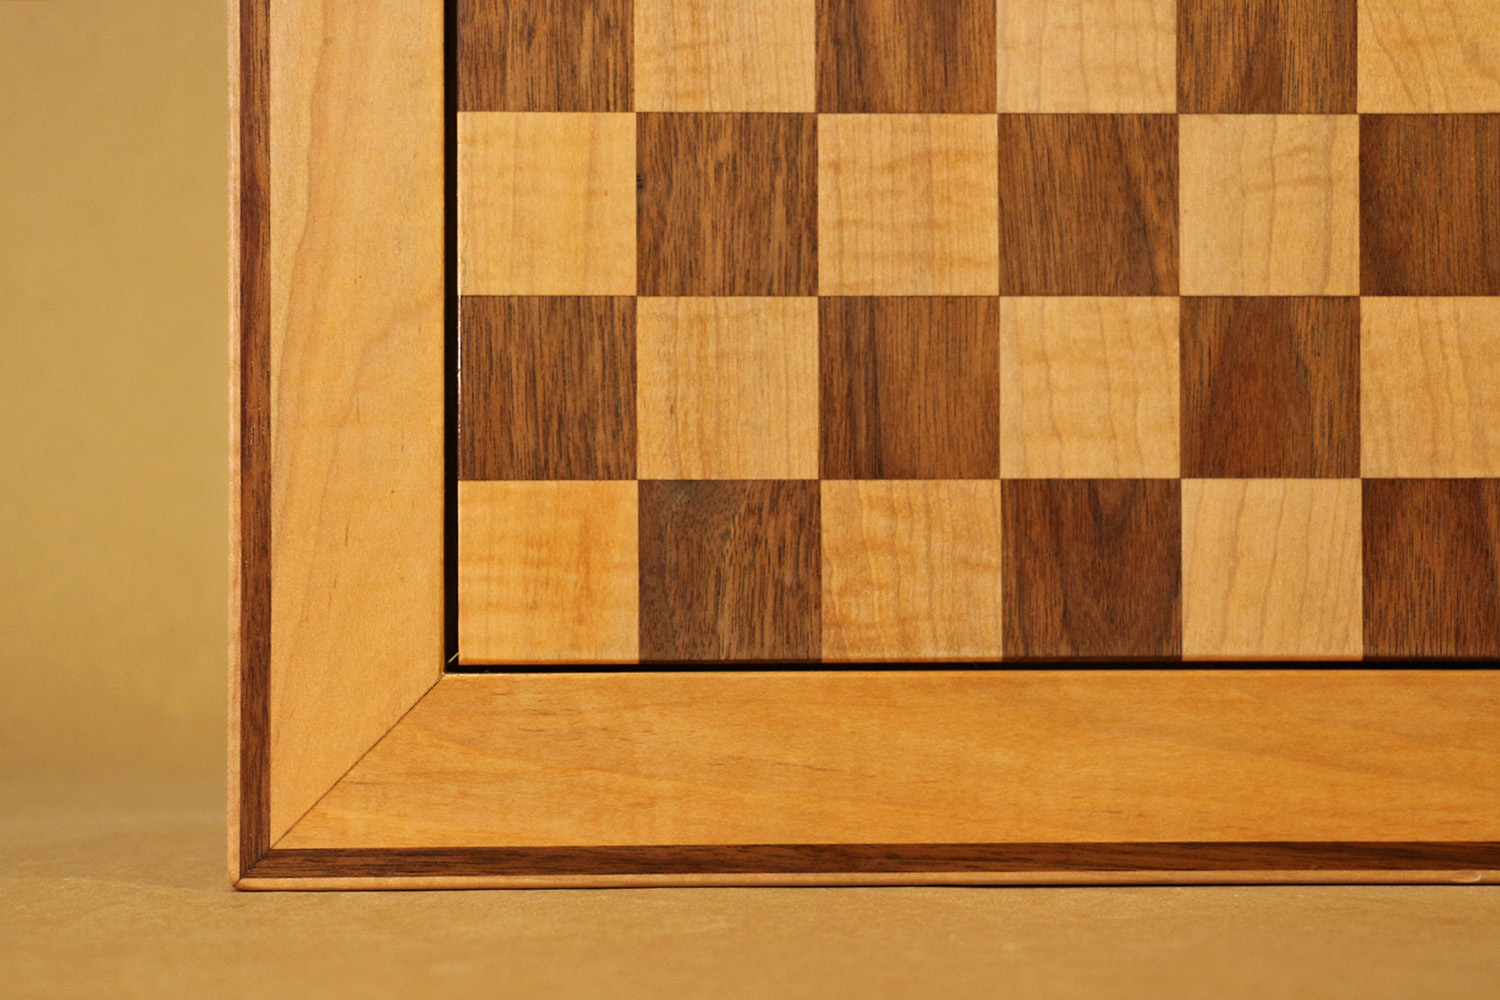
Chessboard:
This walnut and maple chess board has a lot of technical application. I made the board with the long grain showing upward on the squares of the board to show off the curly maple figure and attached the alternating colored strips with biscuits to ensure alignment as well as hold the end grain glue-up together. Keep things square and even is an endeavor all in itself but, after all of that, I quickly realized that I couldn't just glue a mitered frame around the outside because the corners would split as the grain in the checkered board expands and contracts. To solve this problem, I put floating splines between the frame and the board without any glue to allow and an 1/16" all the way around to allow for changes in the grain. And, finally, strength was added to the mitered frame with glued-in walnut splines that you see around the outer corners.